 |
|
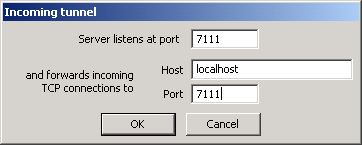
3.10 Tunneling, X11 forwarding, SOCKS5 proxy Defined tunnelsList of defined tunnels. These tunnels are active when Private Shell is connected to the server. New incoming tunnel...
Once you click this button to create a tunnel, you get the following dialog window:  Note: Important Note: New outgoing tunnel...
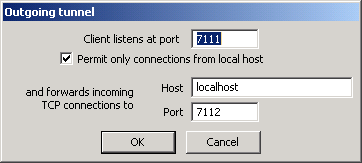
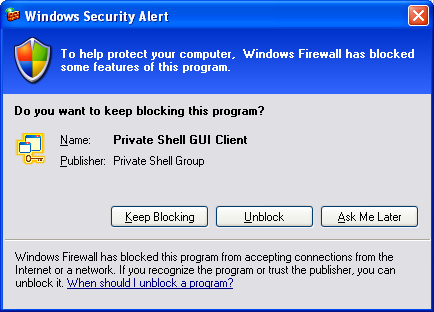
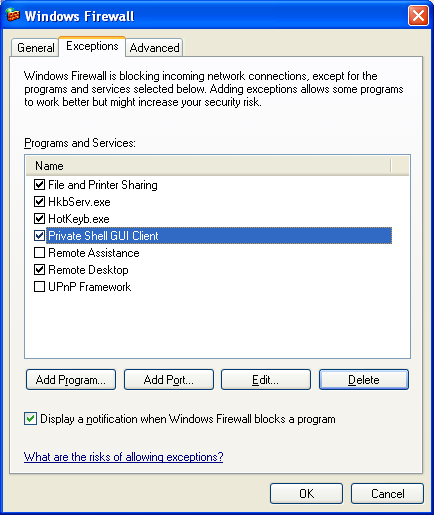
Once you click this button to create a tunnel you get the following dialog window:  Note: Important Note: Edit tunnel...Edit the selected tunnel preferences. Note: Remove tunnelRemoves the selected tunnel. Note: Forward remote X11 connections to local displayCheck this box to enable forwarding of the remote X11 connections to the specified local display. Display number can be entered in the field located to the right of the box. In fact, if you select this option, Private Shell creates a tunnel on the port number 6000 + disp_num, where disp_num is the display number that you entered. Important note for Windows XP Service Pack 2 usersDefault behavior of Windows Firewall in Windows XP Service Pack 2 blocks all incoming connections including the LAN (Local Area Network). So if you define an outgoing tunnel and do not check the "Permit only connections from local host" check box, Windows Firewall will give you the next security alert when an attempt to connect to your computer is made:  When this window appears, just click the "Unblock" button and Private Shell will be added to the list of programs which are allowed to communicate through the network without any restrictions. If you have already clicked the "Keep Blocking" button earlier, you will not be able to use defined tunnels anywhere but from your local machine. To solve this problem, open Windows Control Panel and click the "Windows Firewall" icon. Then select the "Exceptions" tab and check the box corresponding to "Private Shell GUI Client" (or add Private Shell with the "Add Program..." button if it is not already in the list):  Then click the "OK" button to close the window. Now you can use Private Shell without any restrictions. |